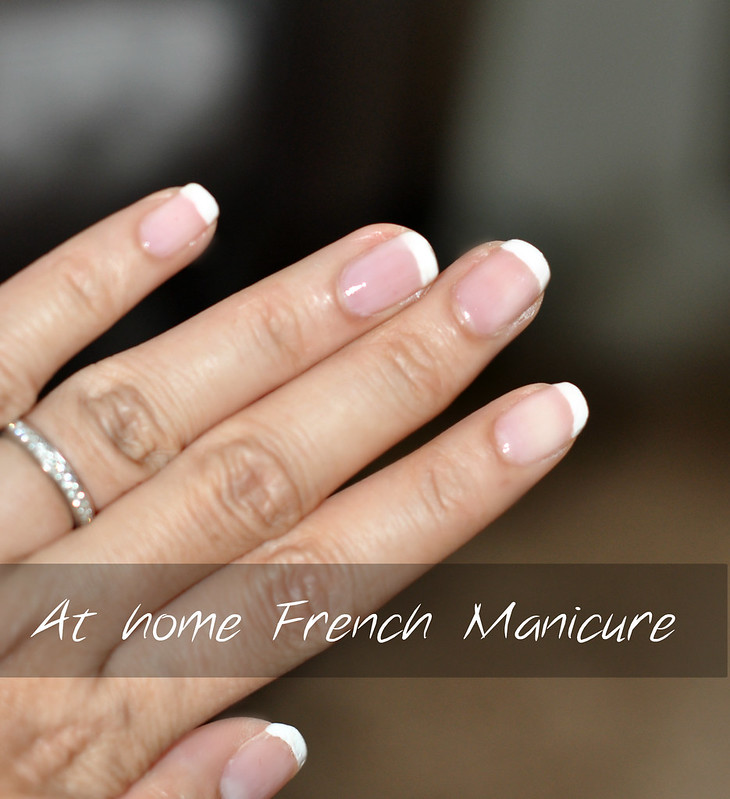
As mentioned in the previous post, I am going to switch things up a bit and blog about different topics. I have several non-fashion related posts in the works and hope to finish them soon. With that said, here is my very first nail tutorial. Personally, I think French manicure is so elegant-looking and also work-appropriate. I've been using this method for a while and it works really well for me. I absolutely hate acrylic nails so this is a great way to create the look without damaging my nails. I hope you enjoy the tutorial.
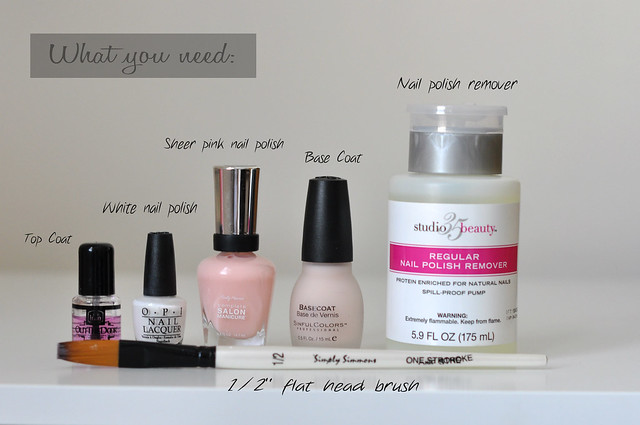
Products used:
Nail polish remover (with acetone)


18 comments:
Thats so smart! They use brushes in nail salons but I never through to try it at home. I'm terrible at giving myself french manicures so I rarely attempt it but I really want to give this a try now.
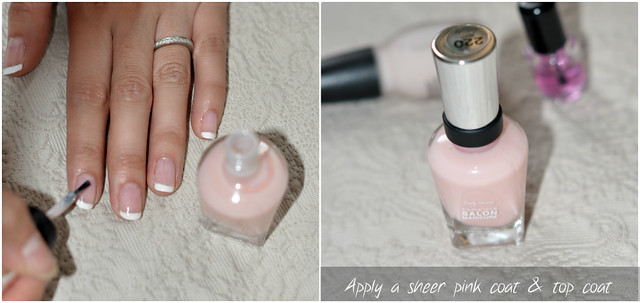
I'm the worst at doing french manicures myself, I used to use tape for an even line, and that worked well for me, but took too much time. I'm always wondering, does the white tip come before the pink or after?
- Christine
love this! so professional! going to try your tutorial hon!!
@Petite Hues Hi Christine, the white tip comes before the pink coat =)
I love your tip of dipping a brush in the acetone to clean up the white tips. My left hand nails always look really good as I'm right handled, but the right nails always take longer and harder to do!
www.petitestyleonline.com
Your mani came out so well! I am terrible at painting my own nails let alone a french mani. I'm so impressed!
xo, Yi-chia
Always Maylee
GREAT tutorial, I do not think I have ever done that good of a job doing my nails!
xx
Kelly
Sparkles and Shoes
Love this! I'm not very good at doing my own French manicure but yours looks perfect! I love the clean, simple look. Very happy to read more beauty posts from you in the future :)
love this tutorial. I think you're doing right and trying to spice up your blog posts a little bit. Good luck and cant wait to see what else you come up with!
xo, Carla
misscarlaviolet.blogspot.com
Very nice, love it.
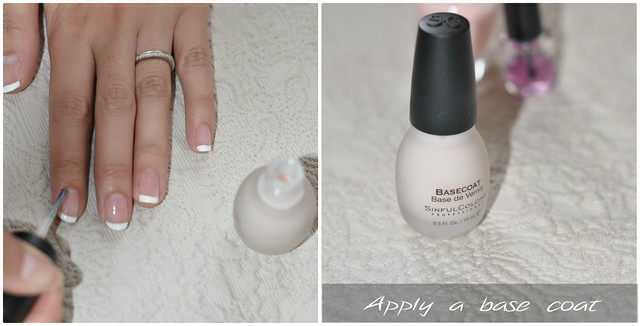
oh my gosh, i've always put a base coat on before the white and it never worked right. why did i never think about doing this? i'm going to give it a try soon, i've been ignoring my nails and they're starting to look a little grungy. i'm looking forward to your other posts!
Hi Sweety
Love your details pictures and tutorials :)
Thank you for the share :)
I follow you on bloglovin!
Would be nice if you follow me back so we stay in touch?
Maybe we can also like each other Fbpage?
I'm waiting for you on my blog!
Love, Lima xoxo
www.limaswardrobe.com
ahh i wish i had the patience and time to try this at home!
xo,
Sandy
Sandy a la Mode
It looks great! So smart to clean it up with a brush afterwards, that's definitely easier than messing around with tape :)
Inge
www.fashionenvie.be
This looks so professionally done! your nails look beautiful! Usually when I paint my nails, the left hand looks pretty good, but then when I have to use my left hand to do the right nails.. it just looks awful- like nail polish exploded everywhere. *sigh*. This tutorial is very very helpful though!
Christy
Sunny with A Side of...
I love this style of nails, always a favourite.
it just looks awful- like nail polish exploded everywhere. *sigh*. This tutorial is very very helpful though!
It always takes me forever and a day to get my nails to look as great as yours. Good job and awesome tutorial.
Post a Comment