Showing posts with label diy. Show all posts

Monday, July 6, 2020

The tie-dye trend

Just in case you're interested, my beloved Coach Cassie is 50% off today. I love this bag so much and this is an absolute steal!!!
CoachCassie50Off_SydneysFashionDiary
DIYTieDyeSet_SydneysFashionDiary
Hope you all had a wonderful and relaxing long weekend with your loved ones. I had an amazing 3-day weekend celebrating Fourth of July with my family. We got together with a couple of friends for a cookout and a lot of boating. With the current situation, we certainly appreciate and enjoy the little things in life more. If you haven't noticed, tie-dye is making a major comeback since lockdown kicked in. It becomes the hottest quarantine fashion trend. A month ago, tie-dye kits were sold out everywhere. They are still hard to find. I got a few Rit primary colors from Amazon and mixed them together to create the colors that I wanted. This is a great activity to do with young kids. I purchased a bunch of solid colored t-shirts, sweatpants, sweatshirts and we had so much fund tie-dying together. If you love the tie-dye trend but don't want to deal with the mess, there are so many cute pieces available for purchase here.

Monday, March 30, 2020

Easy DIY face mask for frontline staff

Untitled
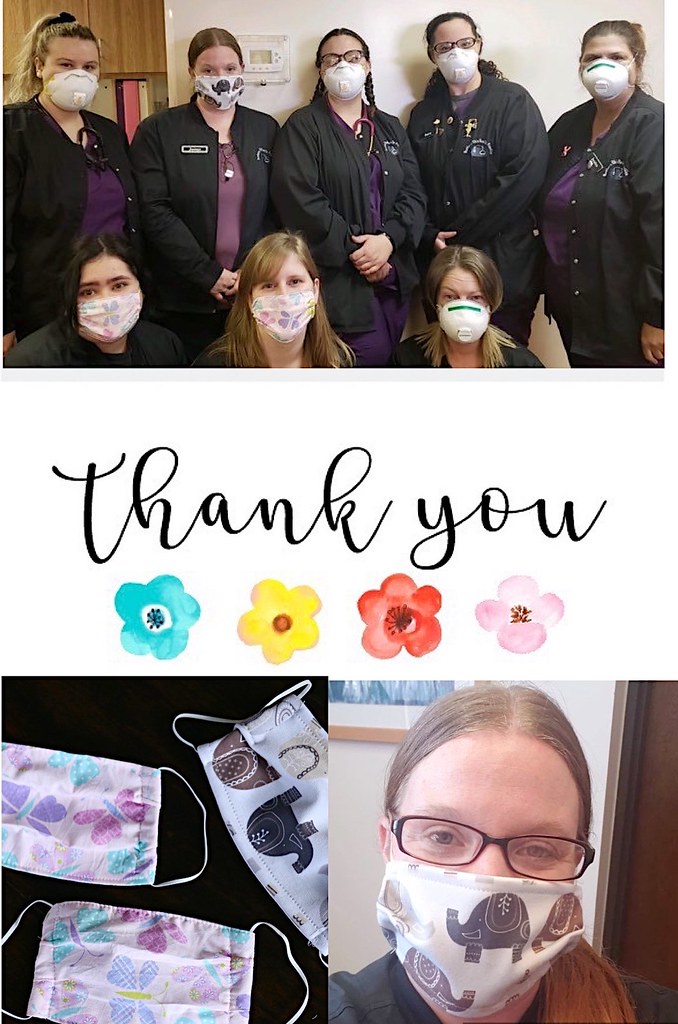
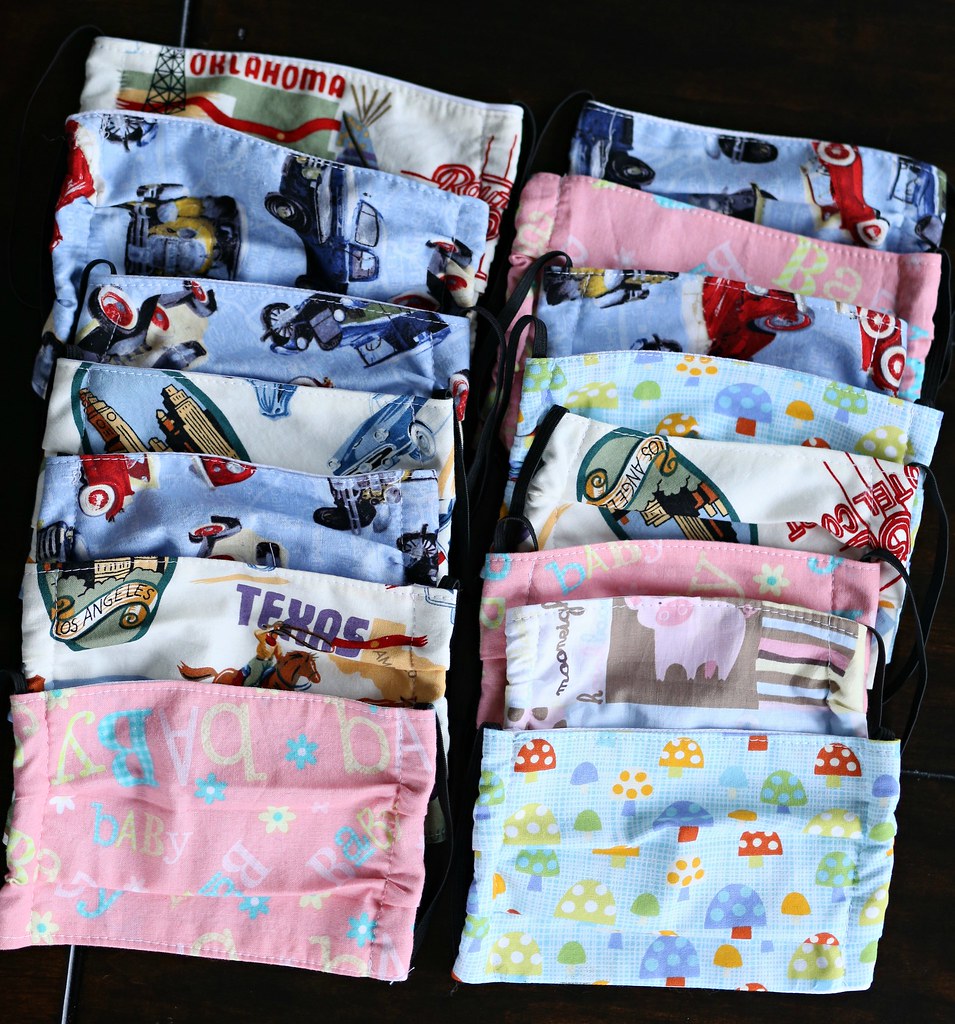
I mentioned in this post that I started sewing masks and donating them to healthcare professionals. My heart aches for these wonderful humans. They are risking their lives to help others without protection. Seeing nurses wearing the masks I sewed for them seriously made my day. I know my sewing skills is questionable but I wanted to help. I spent my entire weekend (between doing chores and spending time with my family) sewing these masks. This batch is on its way to those in need. I found a simpler way to sew a mask. Take a look if you're interested. If I can make them, you certainly can. Please note homemade masks aren't intended to replace N95 respirators. They are approved by the CDC to be used as a last resort when all other PPE options have run out. This is just an added barrier between you and the outside world. If you know how to sew, please consider making masks for front-line staff. I want to do my part to help. Together we are stronger and can get through this!

Supplies:
Instructions:
  • For an adult size mask, cut 1 piece of cotton fabric 6" wide and 9" long
  • Cut 2 pieces of elastic, each 11" long
  • Put the right sides of fabric together
  • Start at the corner, sew both layers together, make sure to leave about a 2" opening
  • Turn them right side out through the opening, Make sure to push out the corners
  • Iron the mask flat, make sure the seam allowance at the opening is tucked inside
  • Fold 3 evenly spaced pleats and iron in place
  • Top-stitch around the entire perimeter of the mask. Make sure all pleats are facing the same direction
  • Fold the right side of the fabric along the shorter sides to create a pocket for the elastic band and sew a straight line.
  • Insert the elastic band through the pocket and tie a knot to the ends
  • Pull the elastic band until the knots are hidden in the pocket
..and you're done! 
EasyDIYFaceMask_SydneysFashionDiary

Tuesday, January 7, 2020

How to get salon quality gel nails at home

Modelones_SydneysFashionDiary
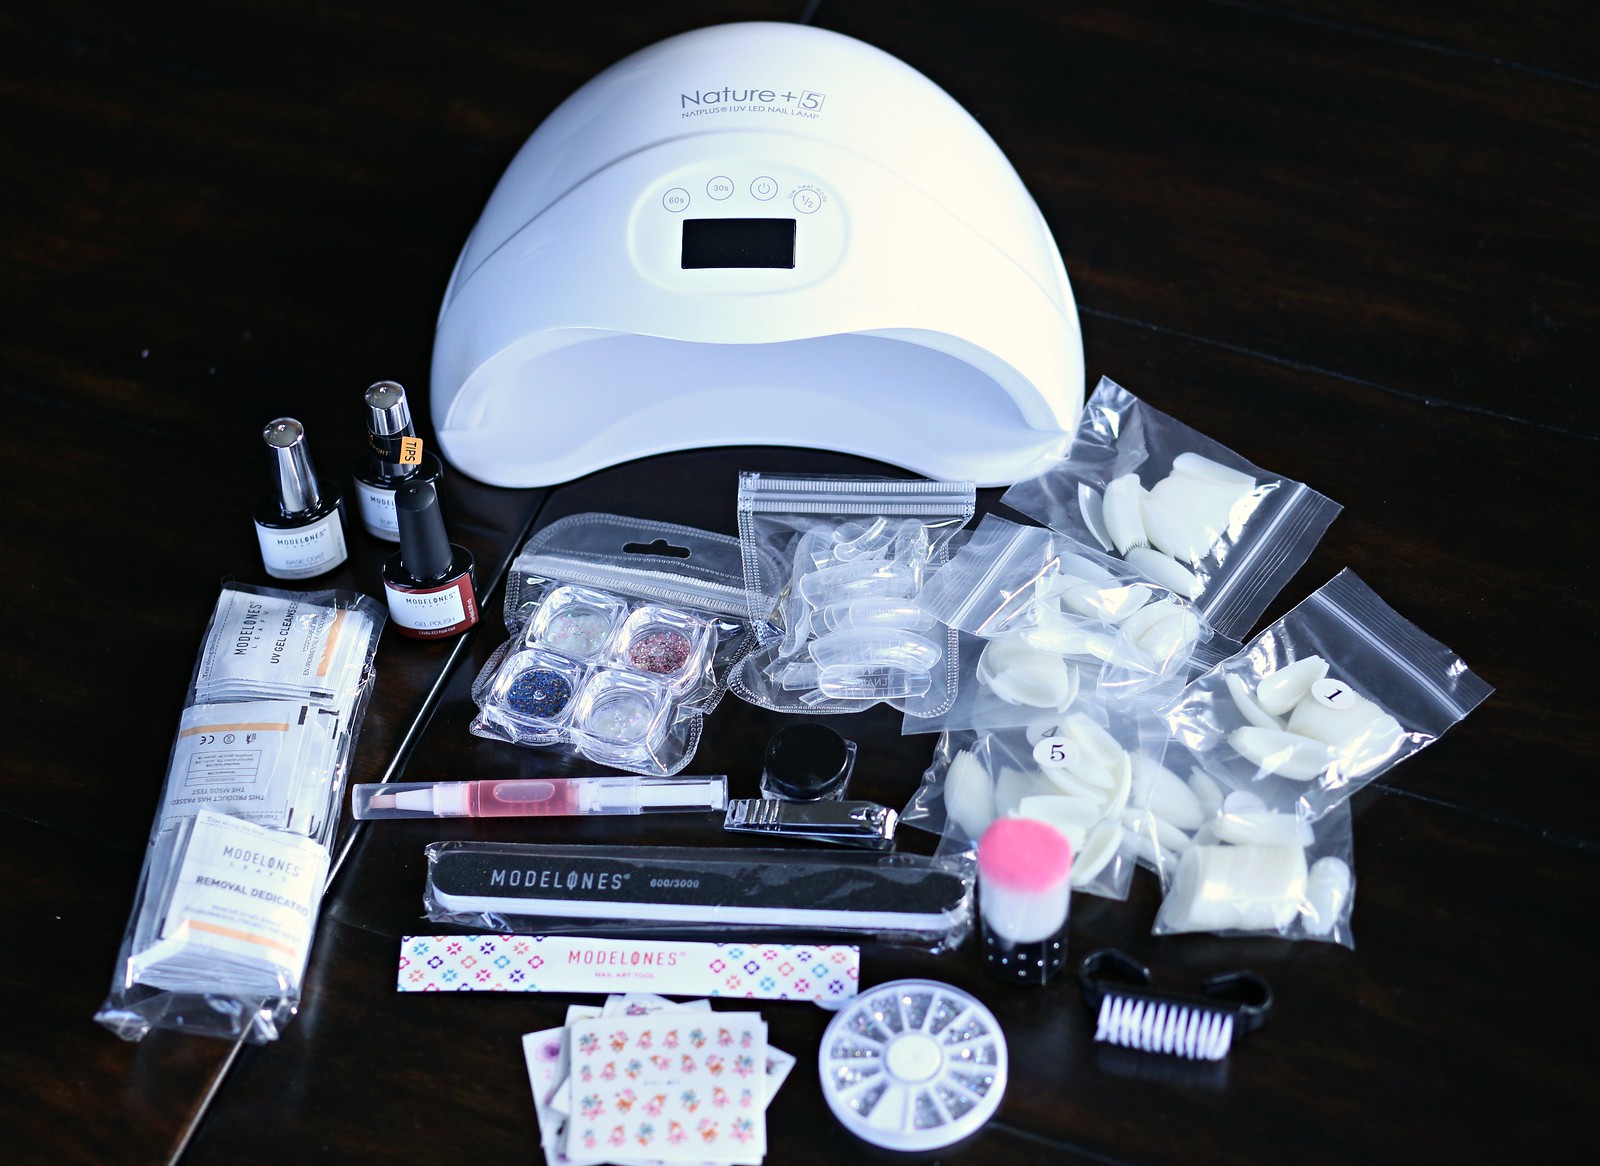
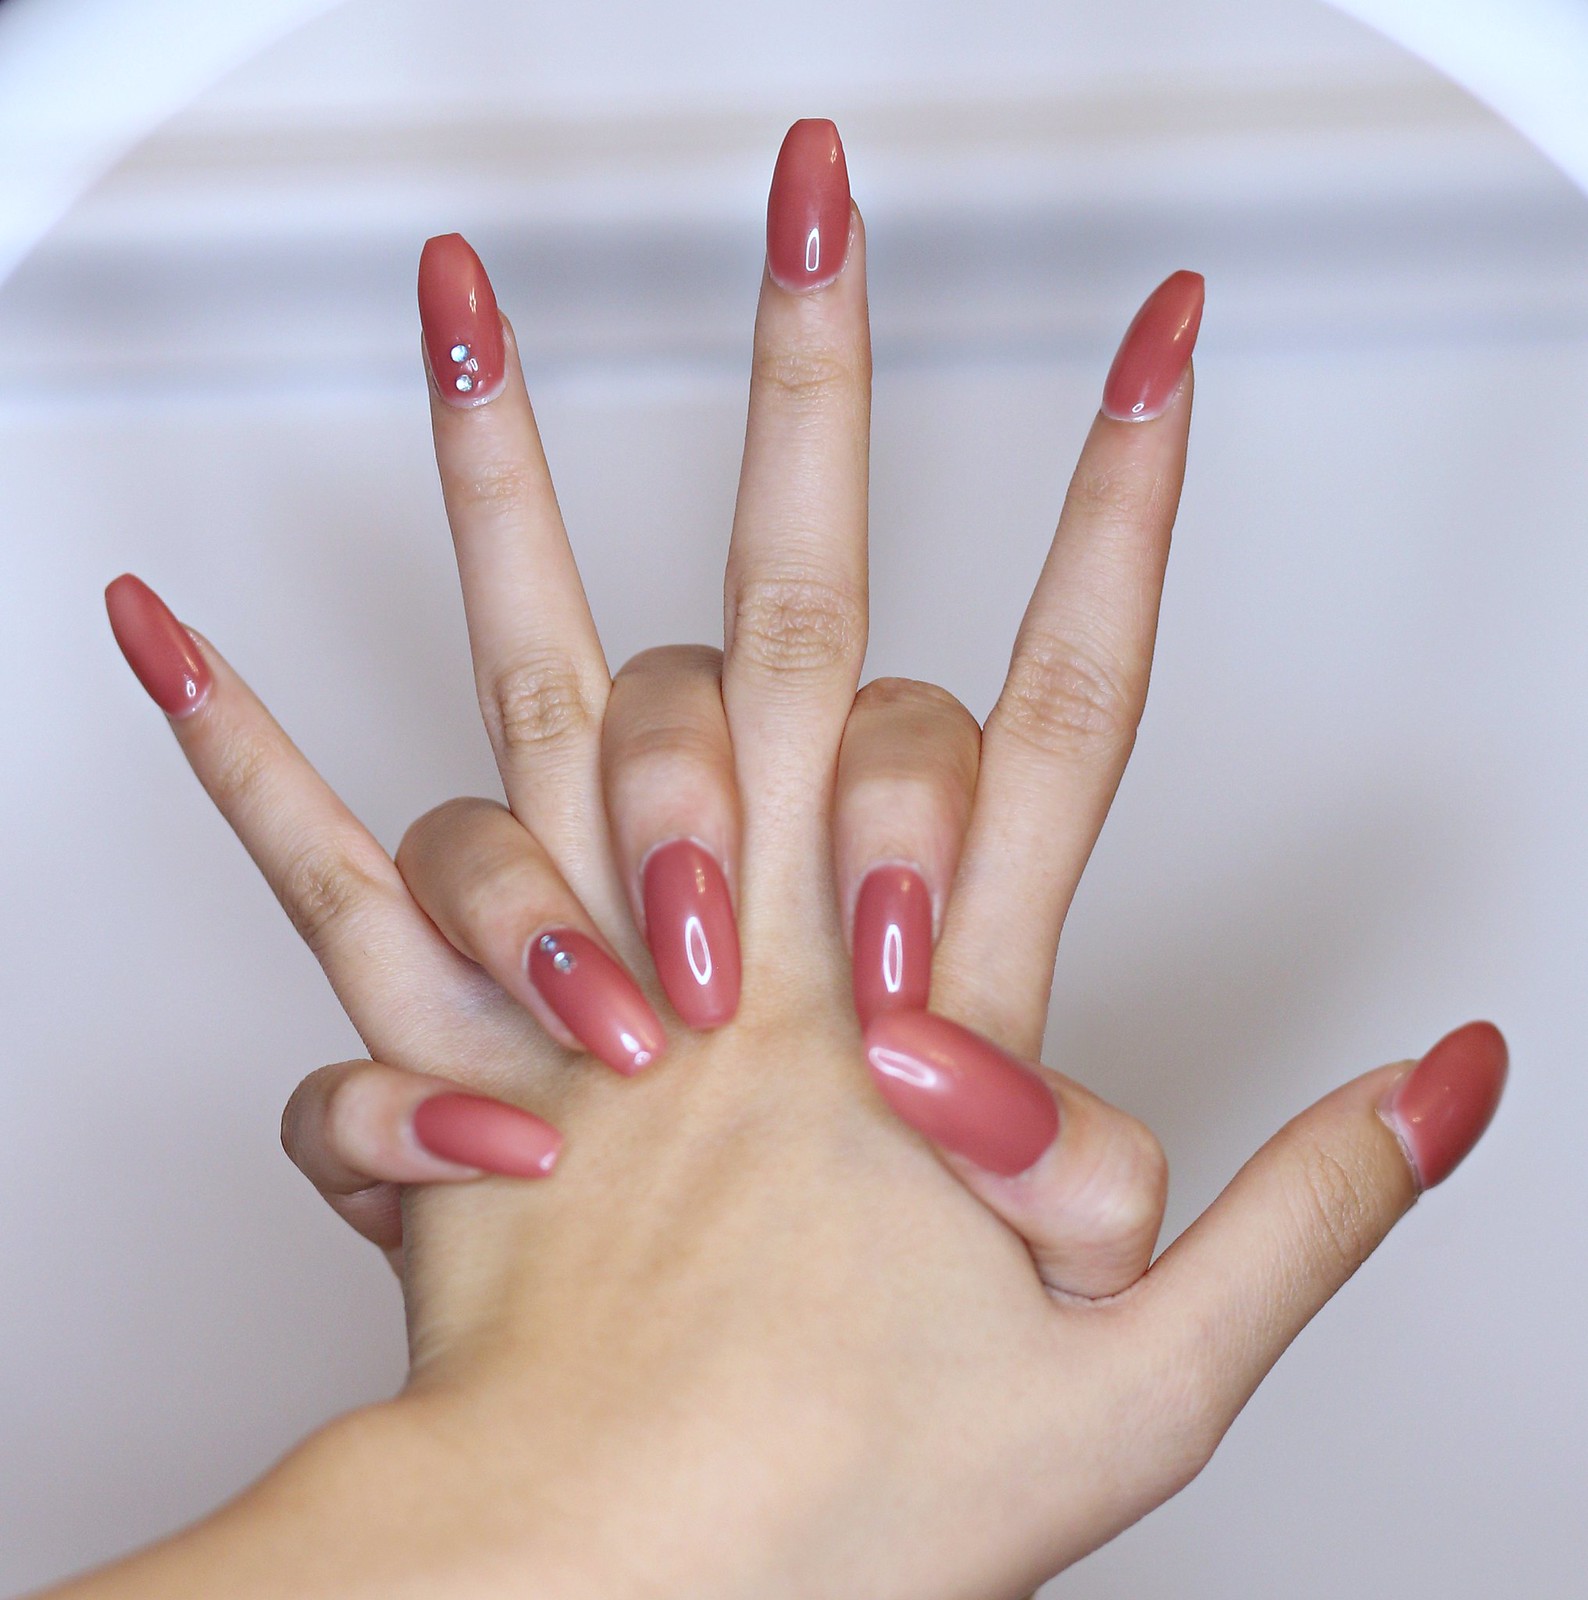
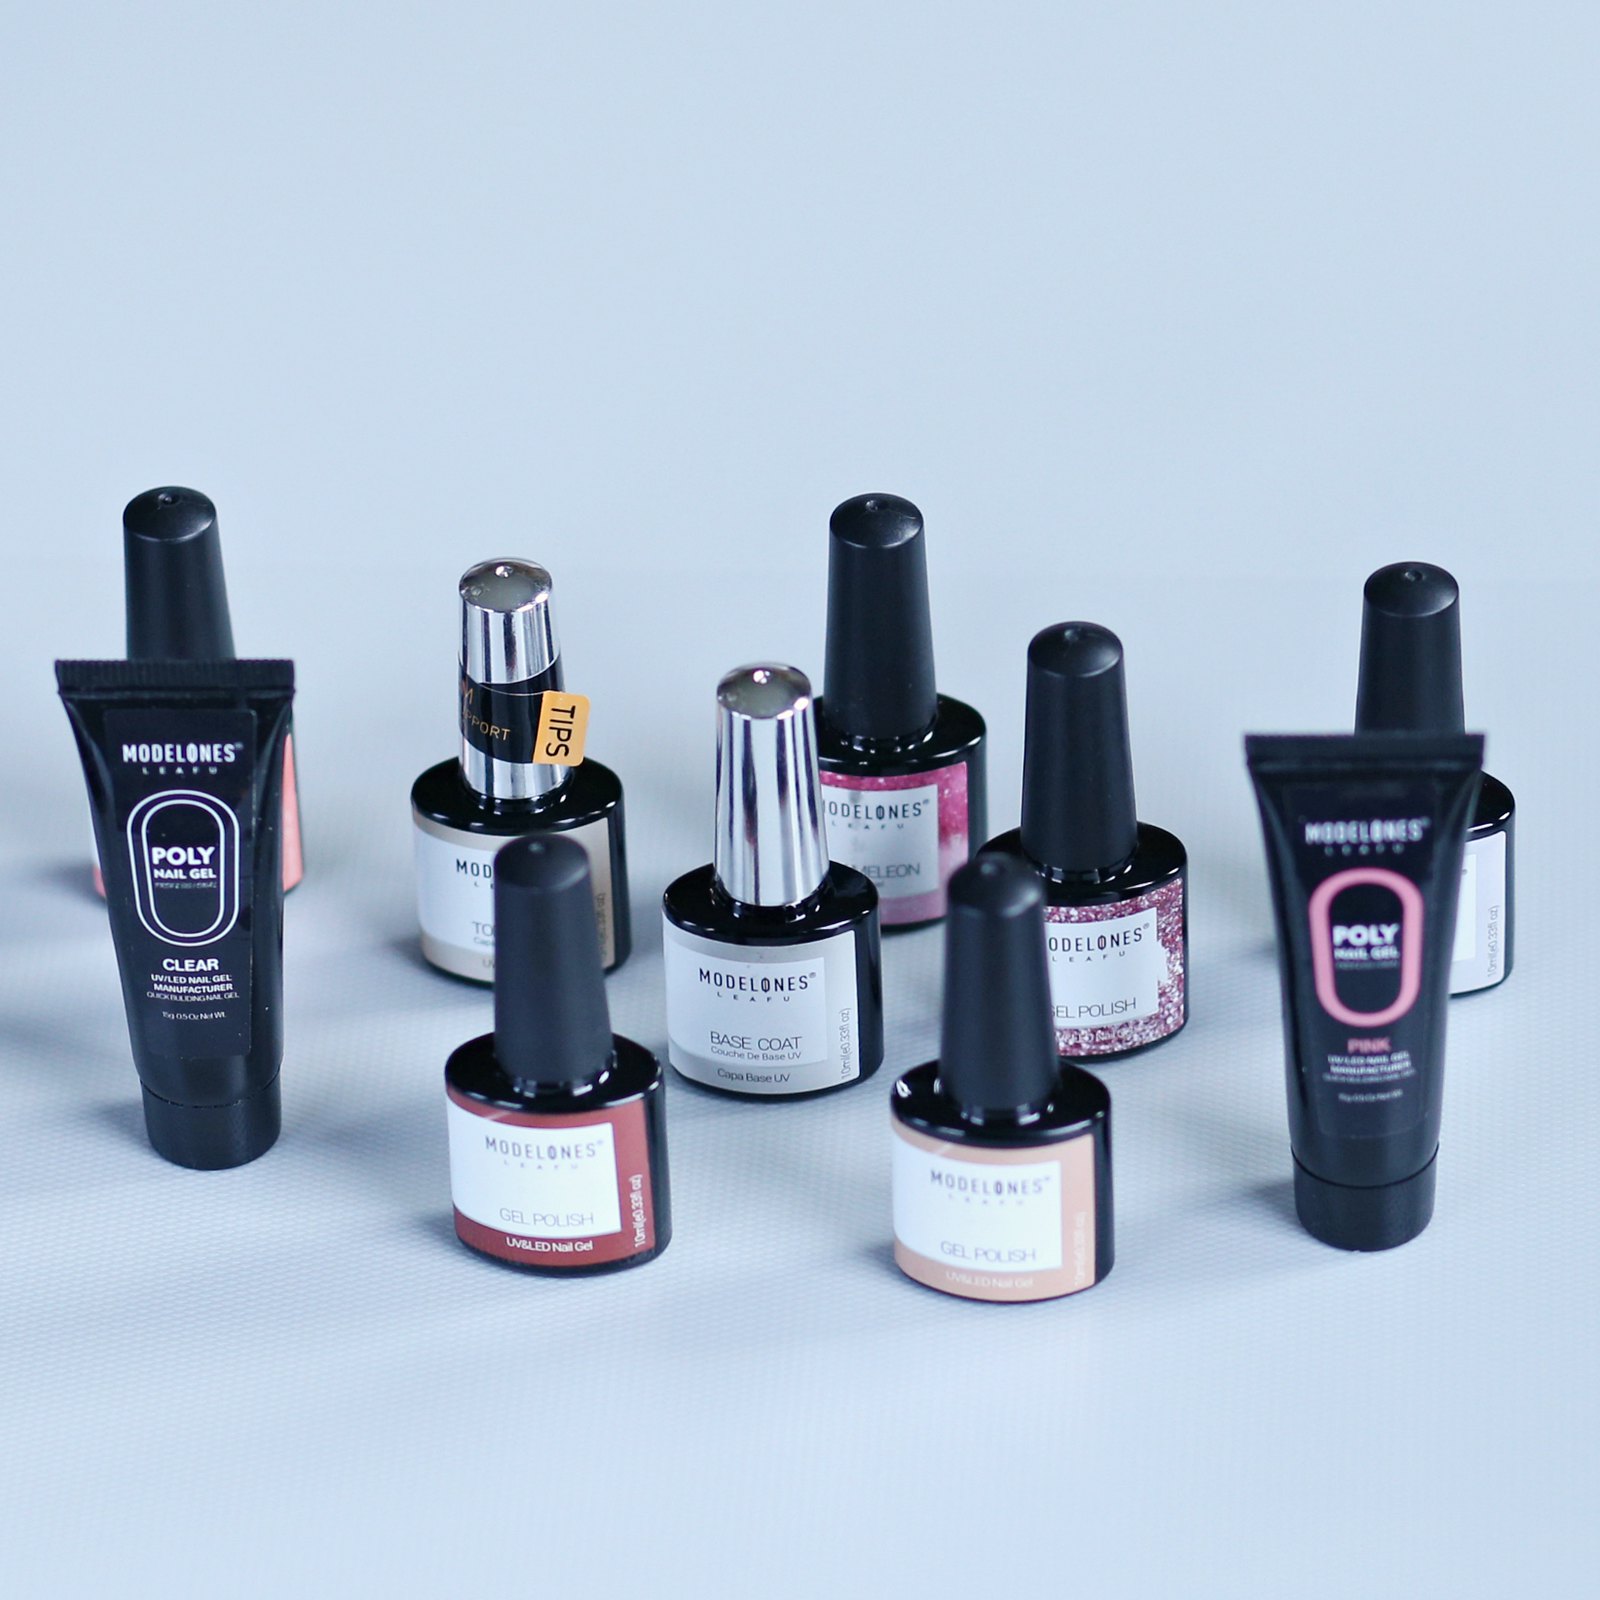
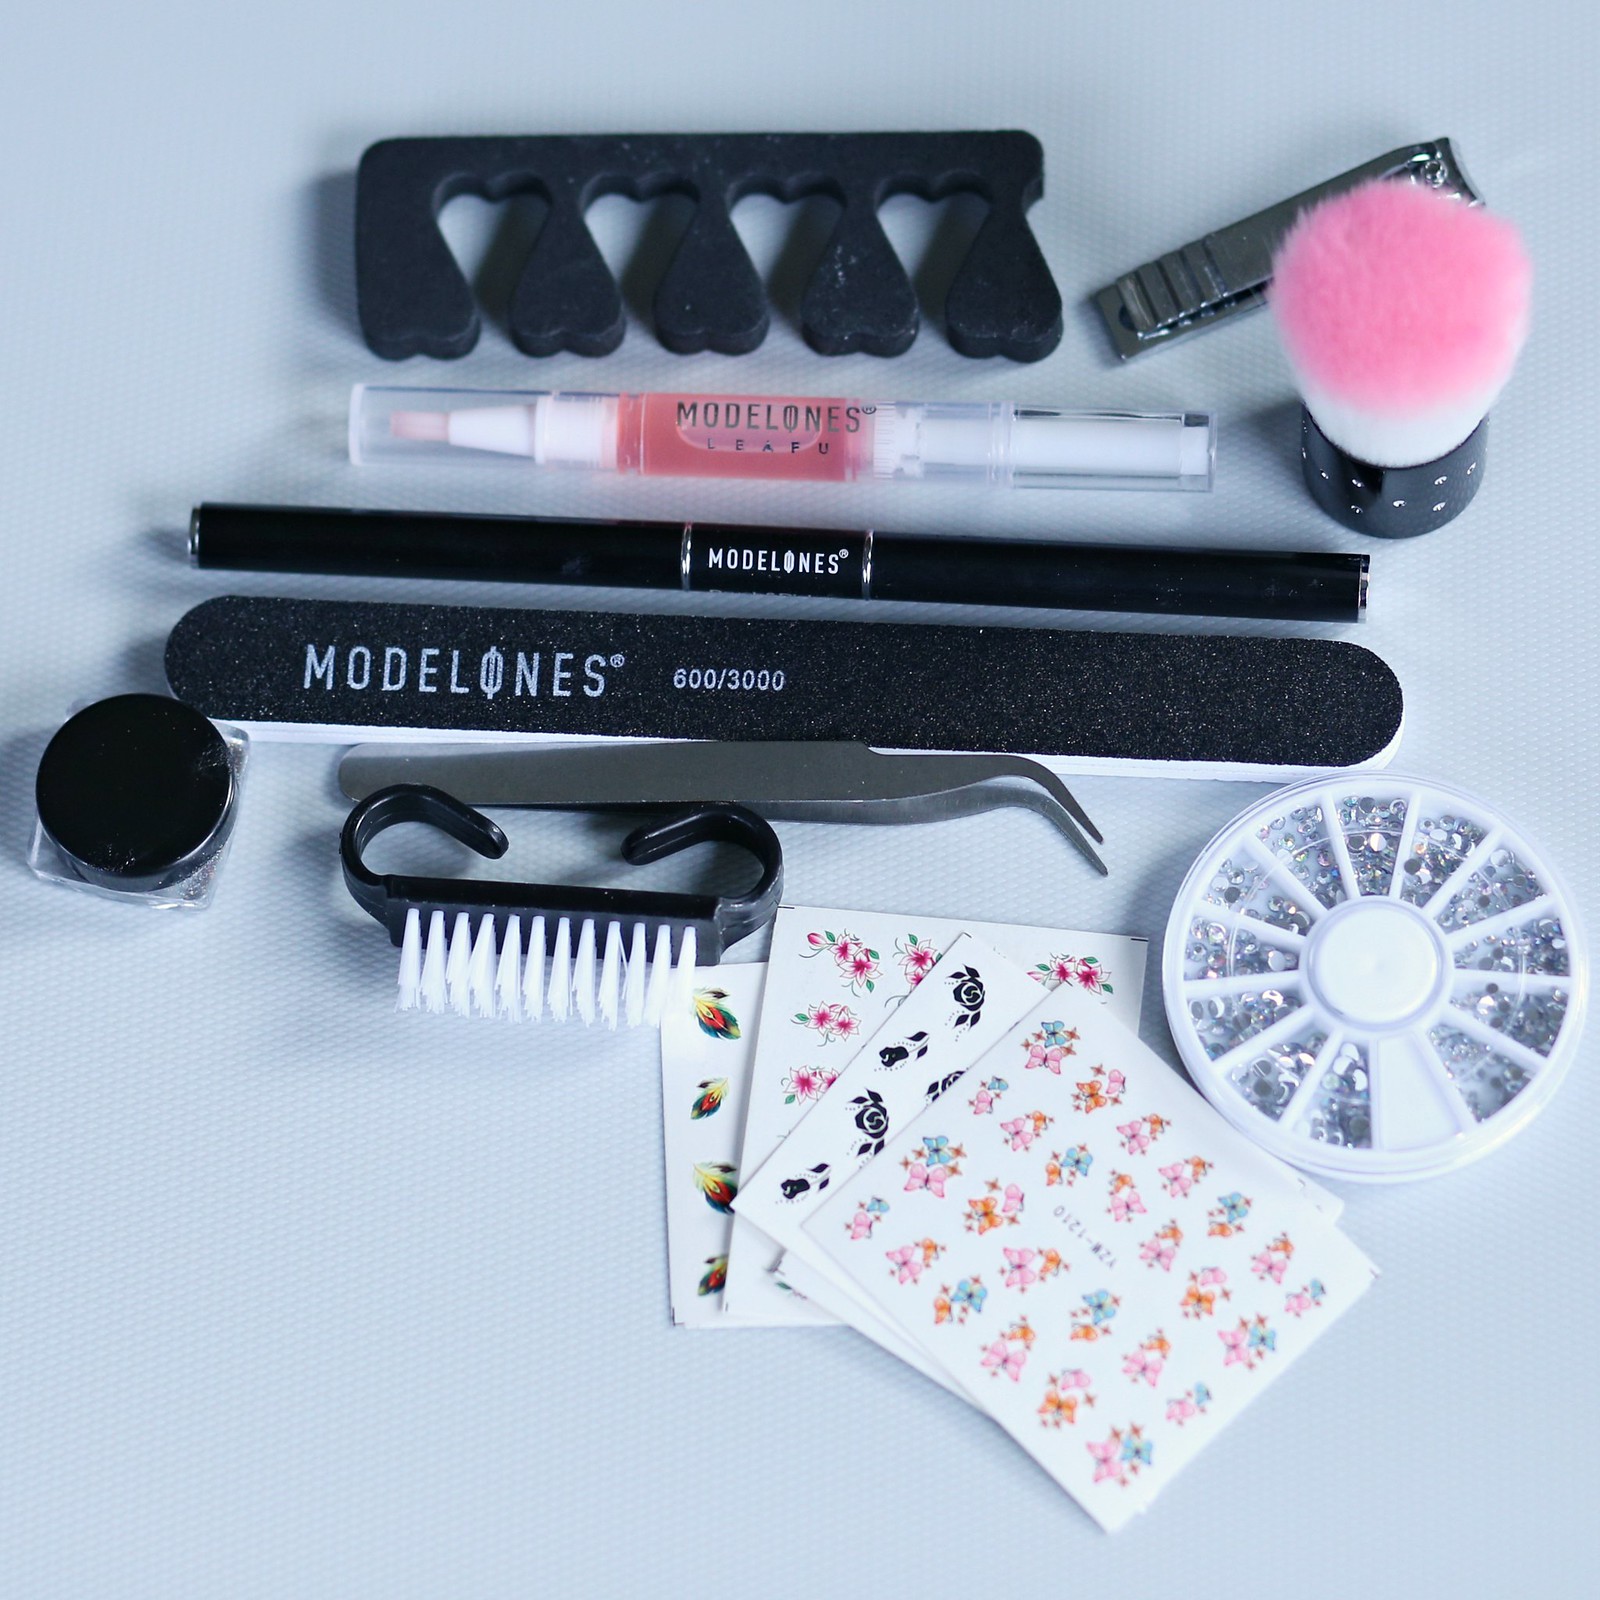
As you make your list of New Year's resolutions, I am sure setting a financial goal is one of them. Reducing expenses is typically the first step toward making your financial goals a reality. If you're a nail salon devotee, you know it can get very expensive. The average price for a full set of gels in nail salons is $50. Gels generally last 2-3 weeks then you have to pay another $50 to get them filled. If you love getting your nails done but don't want to pay $50 every two weeks, I am sharing a way to get salon quality gel nails at home for a fraction of the cost. When Modelones reached out to me, I feel intrigued. They offer so many bundles and sets. There is certainly something for everyone. I chose this starter set and let me tell you, it has everything that you would ever need to do your nails at home and then some. I am really impressed with the quality, the packaging and how easy it is to create salon quality nails at home. If you're interested, check out the video below to see how I did it. Thanks, Modelones for sponsoring this post.

DIYGelNails_SydneysFashionDiary Modelones_SydneysFashionDiary Modelones_SydneysFashionDiary

Thursday, October 31, 2019

DIY Halloween Burrito Costume

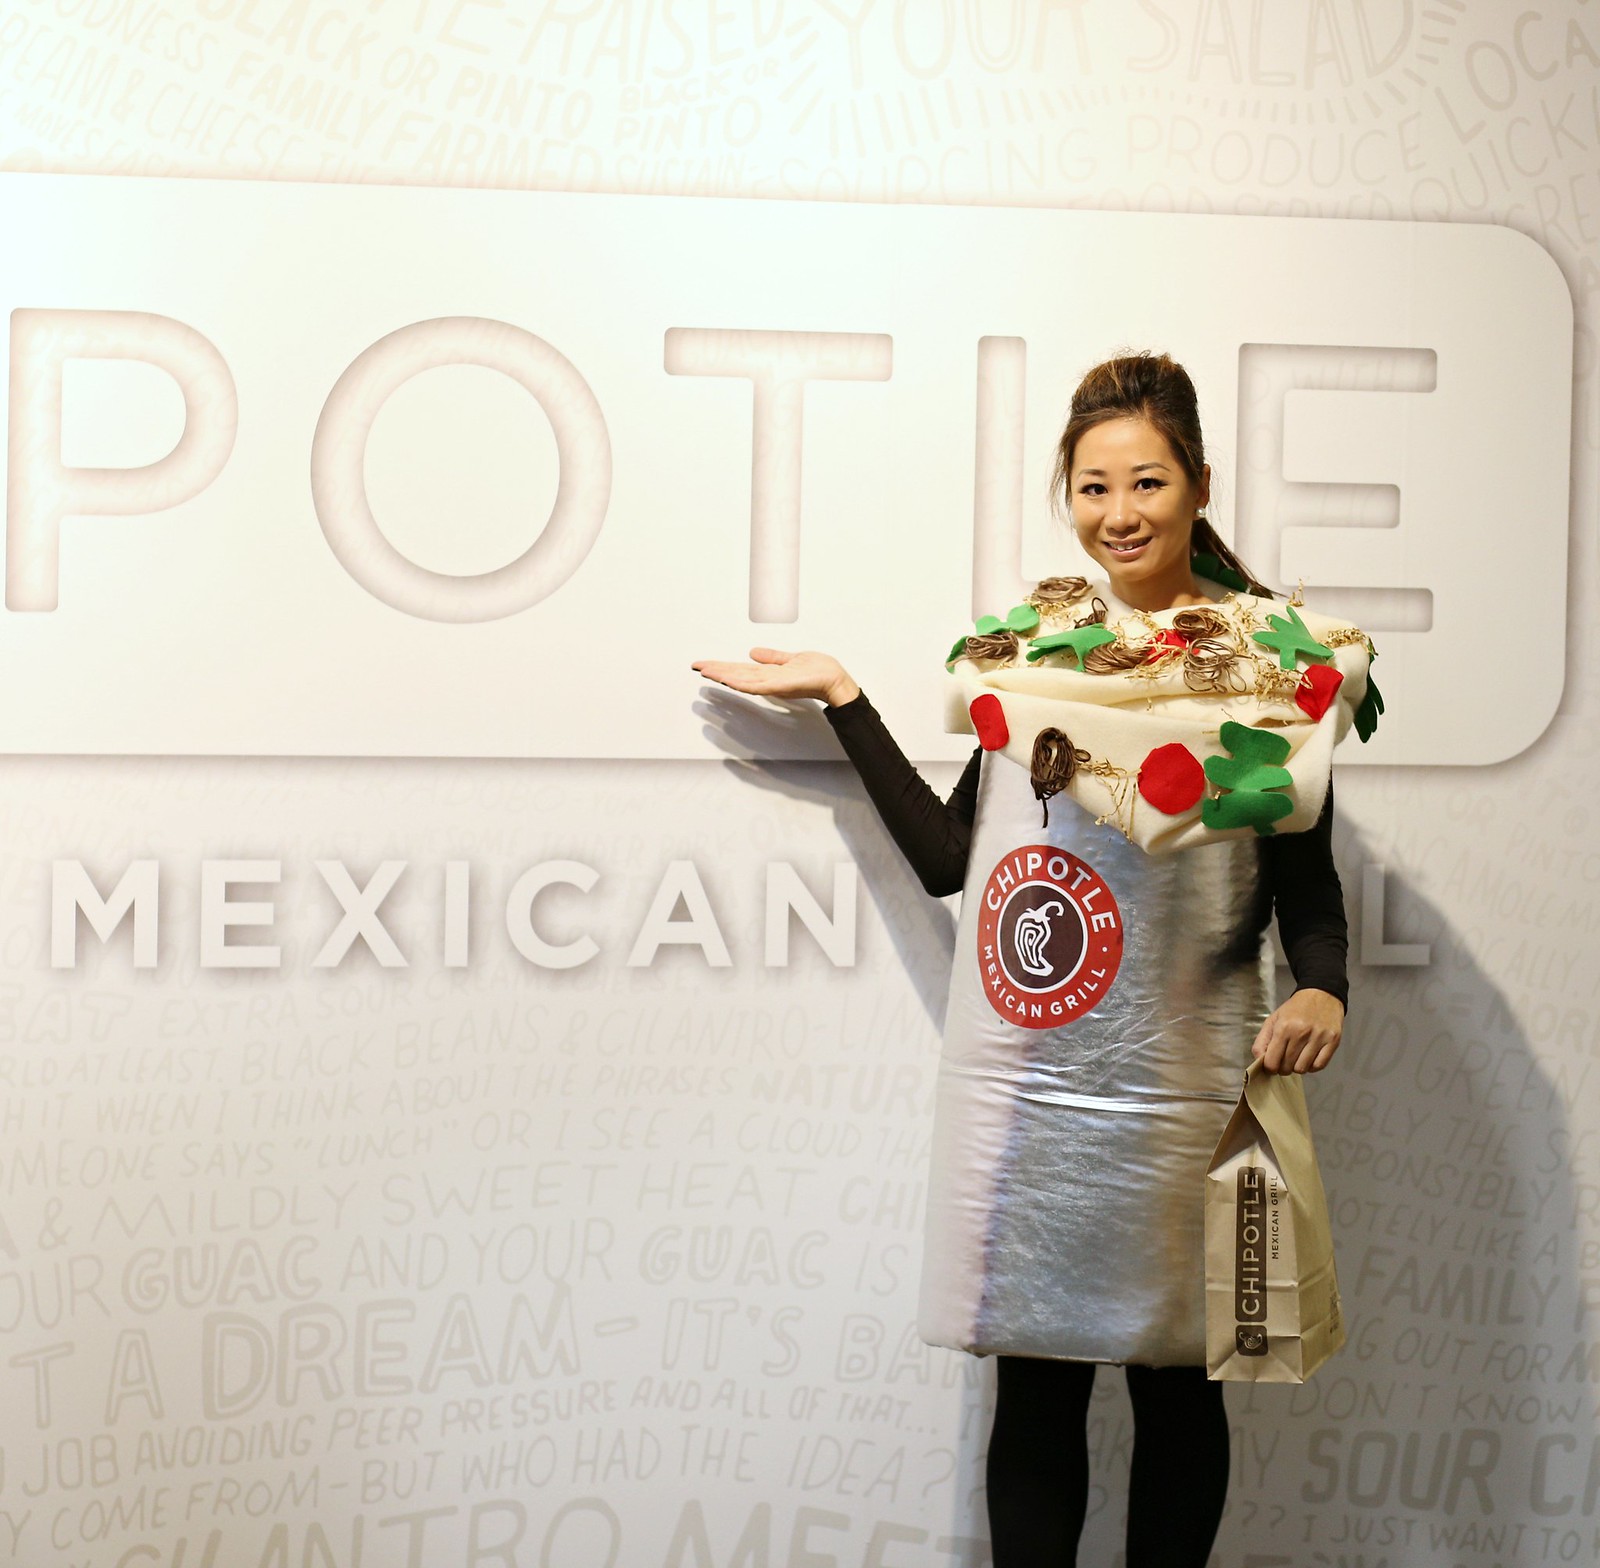
I love Chipotle so this year, I decided to make my own burrito costume. I stayed up until 1:00 a.m. to finish it. I love making my own costume but it's very time consuming. Regardless, I was able to pull it off. Not my favorite creation so far so this will do. I won the "Best Individual Costume" contest at work today!!! Just in case you want to make the same costume next year, I hope you find this tutorial helpful. DIYBurittoCostume_SydneysFashionDIary  
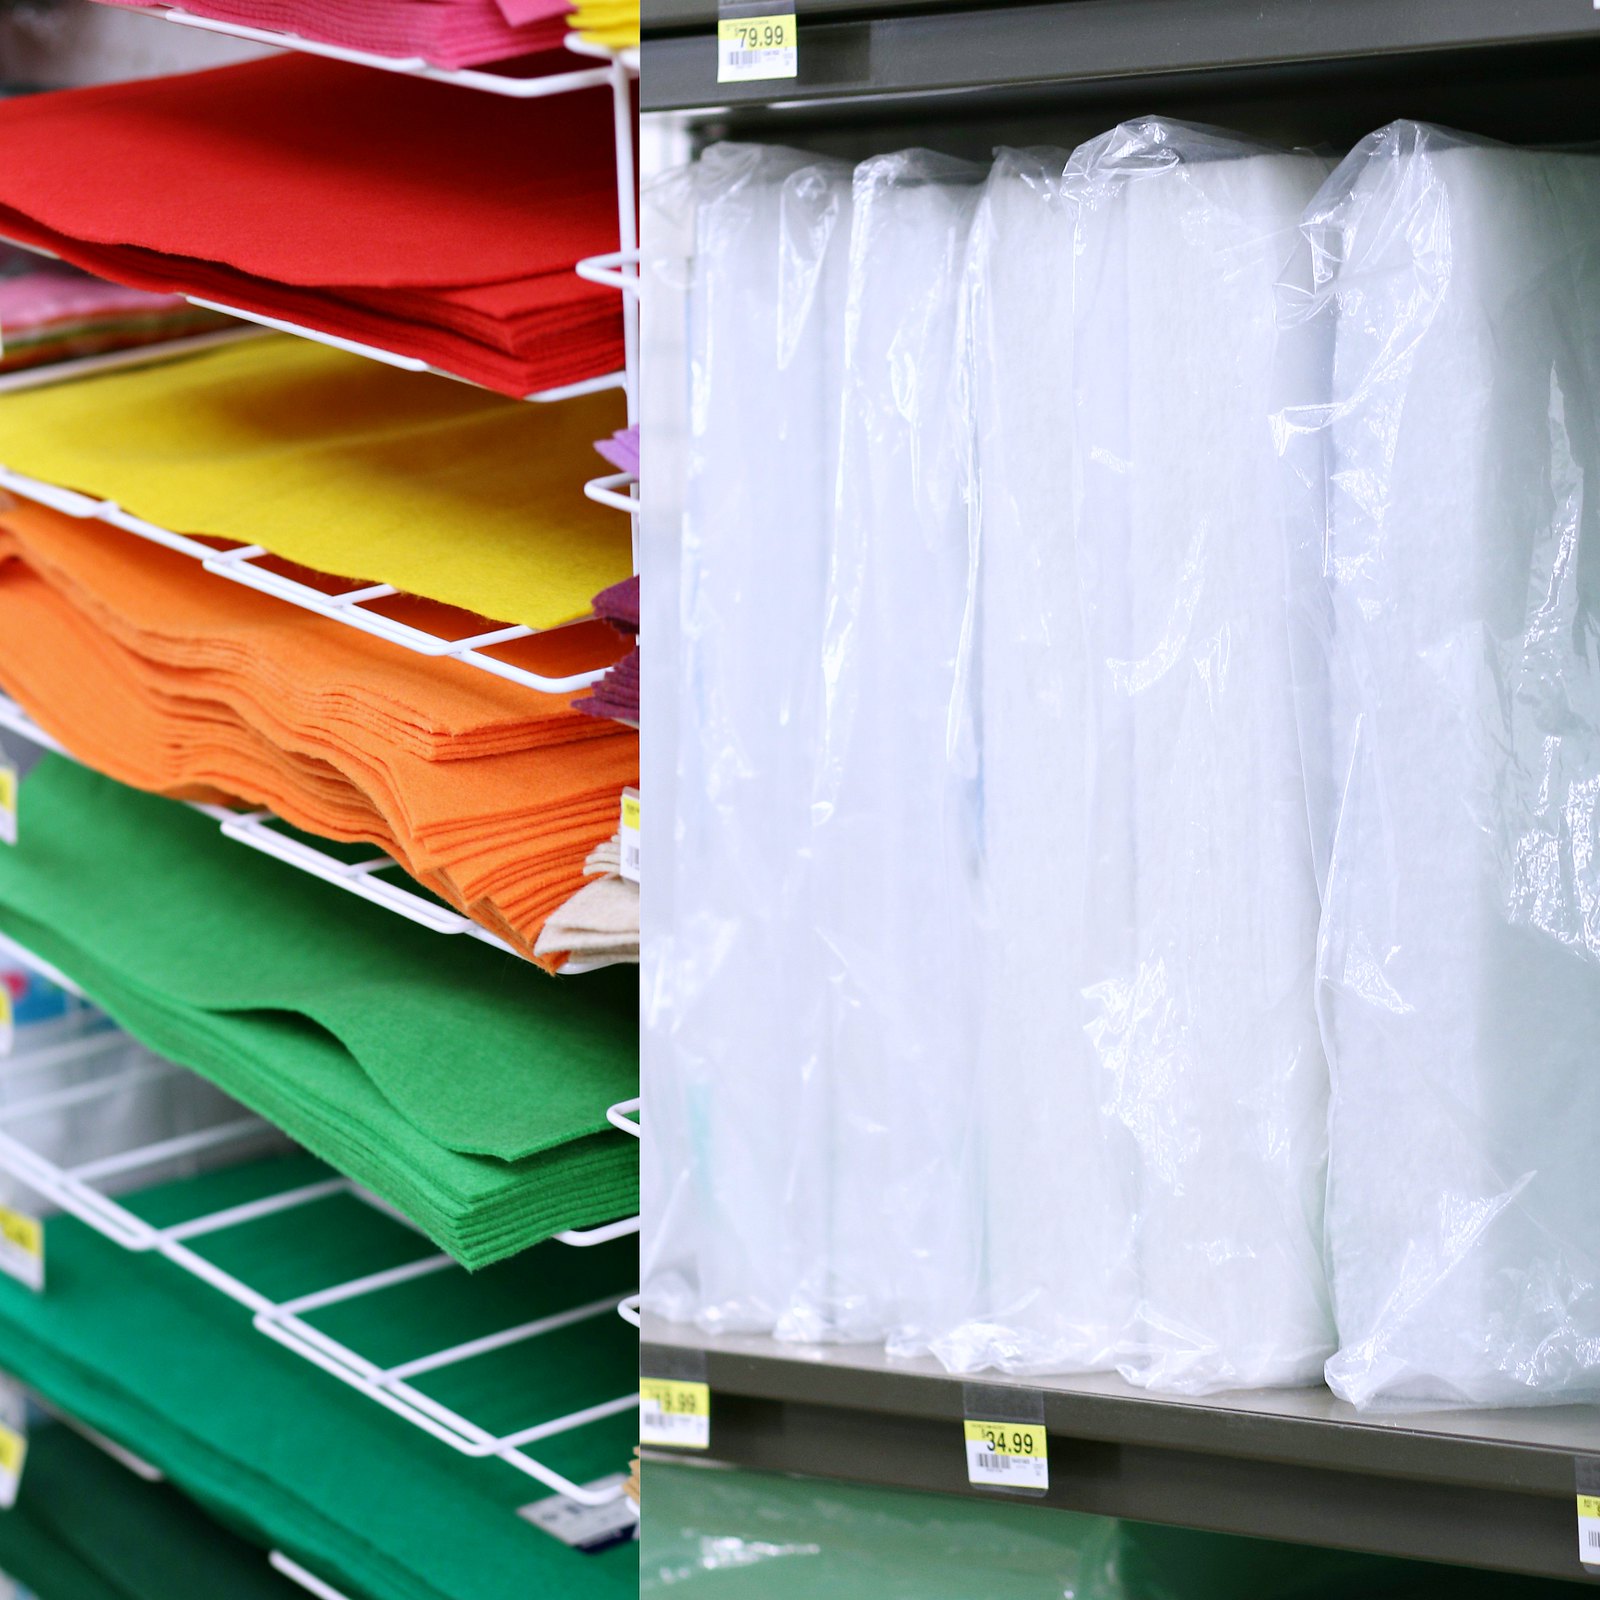
For the burrito: This part is very similar to the Starbucks costume we made last year
  • 1" project foam: Cut to your desired size and hand-stitch 2 ends together (I used 1 yard)
  • Metallic shiny silver fabric (I used 1.5 yard). Wrap the fabric around the tube using heat tape. This kind of tape is really sticky and has strong hold
  • Sew 2 shoulder straps to keep the burrito from falling down
DIYBurittoCostume_SydneysFashionDIary

For the toppings:
DIYBurittoCostume_SydneysFashionDIary
There you have it! Are you dressing up tonight? Speaking of dressing up, I got this shark outfit for my puppy. Unfortunately, it was too small on him even though I got the biggest size. Regardless, he still looks so adorable in it. Hope you'll have a happy and safe Halloween! DogCostume_SydneysFashionDiary

Monday, October 30, 2017

DIY Starbucks Frappuccino Costume

DIYStarbucksFrappucinoCostume_SydneysFashionDiary  
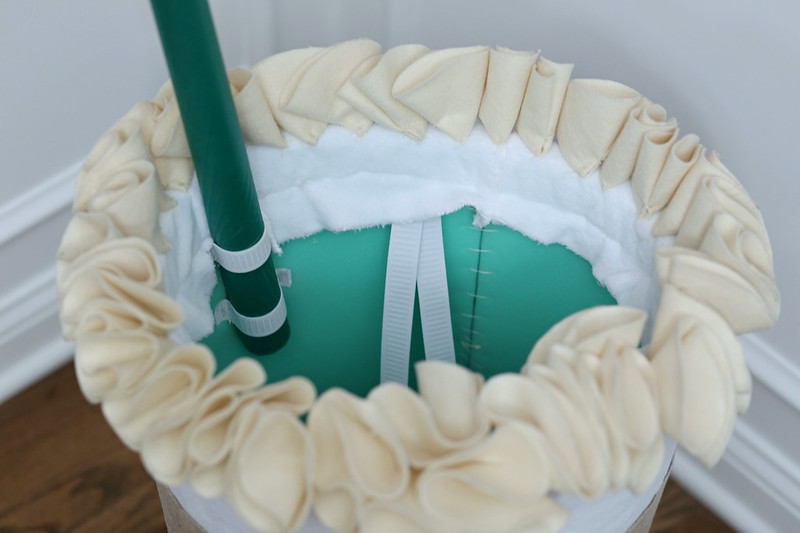
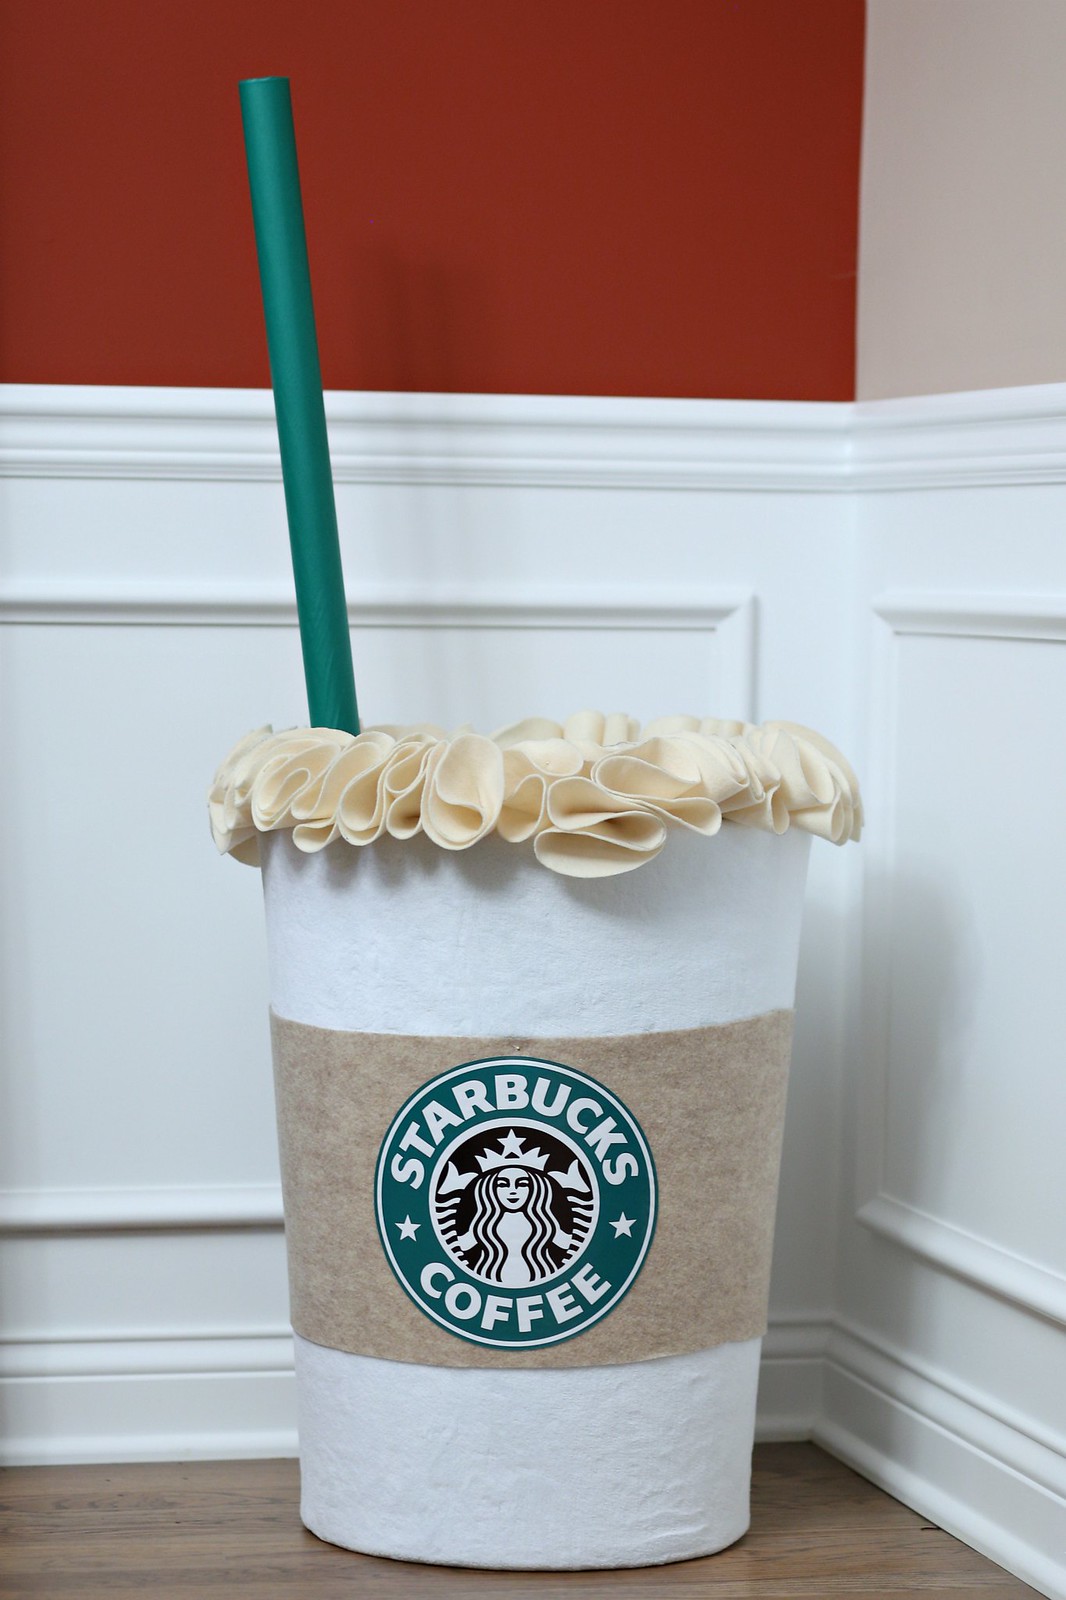
As a Starbucks addict, this costume should come as no surprise. Took us quite a bit of time to figure it out. The challenge we ran into was finding the right materials. There are many tutorials available online but most of them were using a piece of clothing for the cup. I wanted to look like a real cup lol. I couldn't find any instructions on how to make a structured cup like this. We spent hours at a local fabric store and many trips back and forth. We finally figured it out and I am so in love with the end result. We started on Madelyn's first, made some mistakes, learned through trials and errors and my cup is perfection! Most instructions call for a hot glue gun but I just sewed everything by hand just to be sure nothing will fall out. We got them done around 11:00 pm last night. If I have a chance to take pictures either today or tomorrow, I will update the post. I also ordered this apron and this 9" Starbucks decal for my husband. He's going to be a barista!

DIYStarbucksFrappucinoCostume_SydneysFashionDiary

Friday, August 4, 2017

How to Make Your Hat Fit Tighter

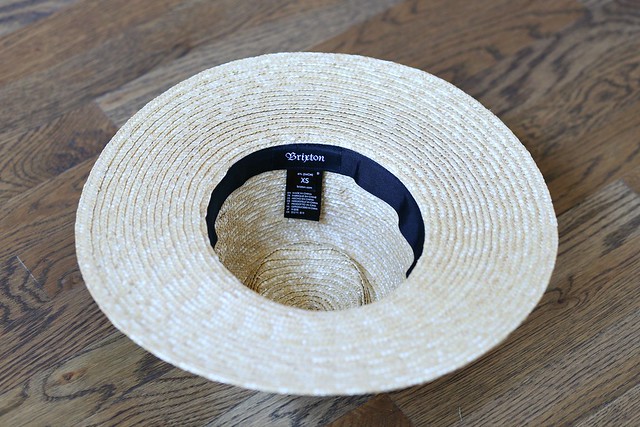
HowToResizeAStrawHat_SydneysFashionDiary

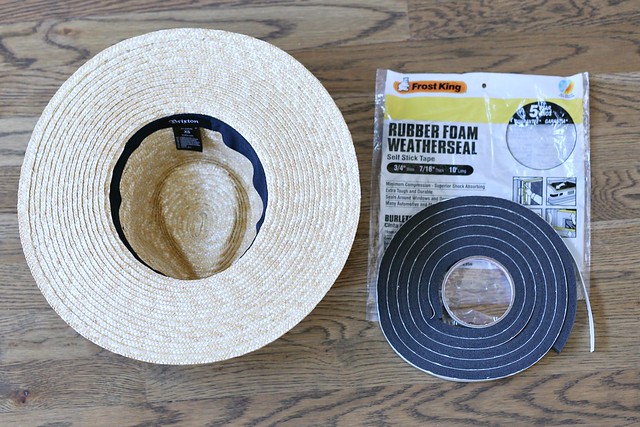
No handbag-related content today but I do have a super easy tutorial for you. I love wearing hats but can't never find one that fits my super small head. Before going on vacation, I knew I needed a straw hat to protect my newly microbladded brows. I was super excited to see this Brixton hat available in a size XS. I had high hopes for it but sadly, it was still too big for my head (the diameter of a size XS is 21.5"). I love the hat so much that I determined to make it work. See details below (it's very self-explanatory). I went boating and the hat stayed on my head like a champ. I used Frost King foam tape to add thickness to the band. You can adjust the tightness of the hat to your liking by the amount of tape you use. When you're satisfied with the measurement, put a couple of stitches into the band to ensure the tape is secure. You can also use fabric glue if you prefer. I am so excited to have this hat and will be looking into purchase a wool hat for the upcoming Fall season.

HowToResizeAStrawHat1_SydneysFashionDiary

Wednesday, June 24, 2015

DIY: Coco Inspired Bracelet


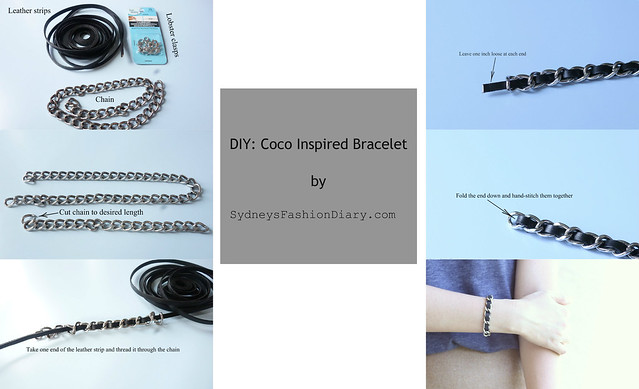
DIYCocoInspiredBracelet_SydneysFashionDiary DIYCocoInspiredBracelet_SydneysFashionDiary

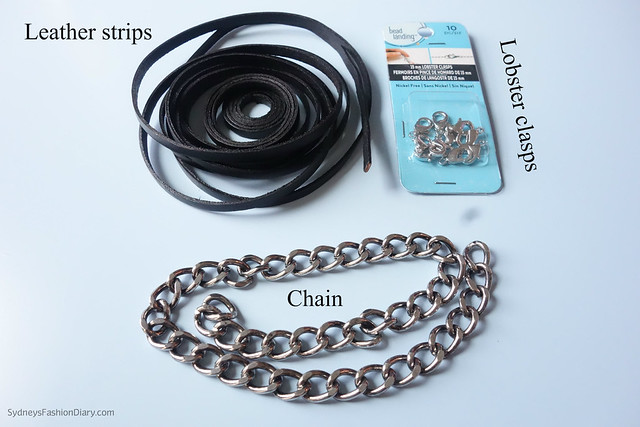
Being a huge Chanel fan, this bracelet is right up my alley. The combination of leather and chain totally gives it a cool vibe. However, I have a hard time spending that kind of money on costume jewelry. Since it looks quite simple, I decided to try my hand at DIYing it. It took me a while to figure out the right size of the leather cord. Couldn't find anything at the local craft stores, I ended up ordering a small roll of leather cord from Etsy. The rest of the materials I found at a local Michaels. The process itself is pretty simple (take me less than 15 minutes from start to finish). I hope you like the tutorial. Let me know if you have any questions. Happy Wednesday!

Sunday, June 2, 2013

Tutorial: At home French Manicure

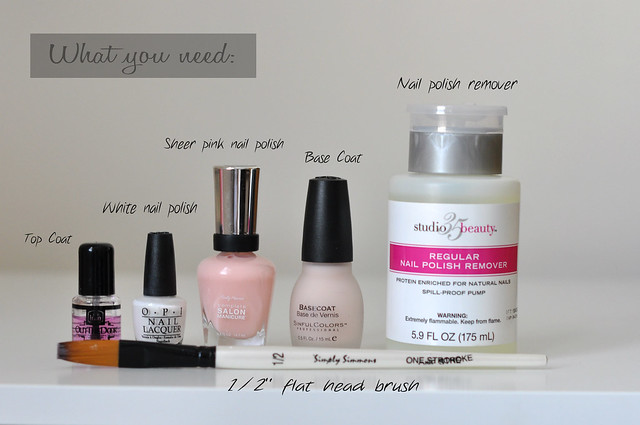
As mentioned in the previous post, I am going to switch things up a bit and blog about different topics. I have several non-fashion related posts in the works and hope to finish them soon. With that said, here is my very first nail tutorial. Personally, I think French manicure is so elegant-looking and also work-appropriate. I've been using this method for a while and it works really well for me. I absolutely hate acrylic nails so this is a great way to create the look without damaging my nails. I hope you enjoy the tutorial.


Products used:
Simply Simmons 1/2" brush (I got mine at Michaels)
Nail polish remover (with acetone)


Friday, March 8, 2013

Newspaper Print Skirt


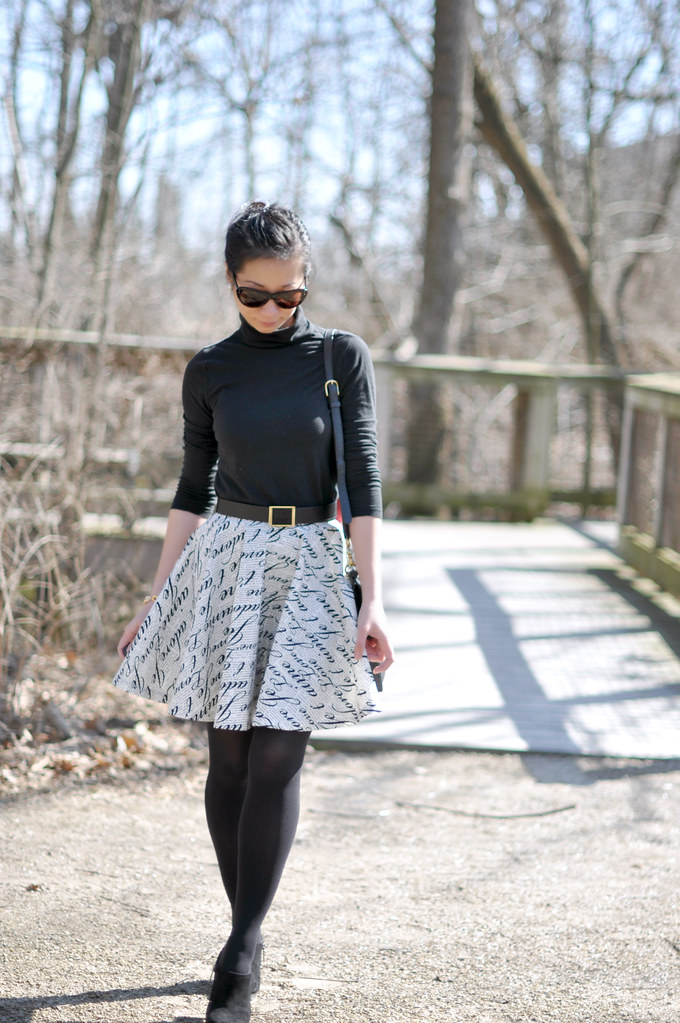
Admired the Carrie Hammer newspaper skirt but I couldn't shell out almost $300 for a skirt so I decided to make my own. If you're interested in making this skirt, check out the tutorial here. This is my second DIY skirt and I am very happy with the result. I paired it with a black top to keep the rest of the outfit neutral so that the skirt can truly shine on its own. I look forward to wearing this skirt without tights when the weather gets warmer.


What I am wearing: 
Top: J.Crew tissue turtleneck - size XXS
Jacket: J.Crew icon trench - size 00R
Sunglasses: Selima for J.Crew (similar style from Selima)
Belt: Talbots (I adore this one from Tory Burch)
Shoes: Bandolino Cardinal booties (on major sale now!)
Purse: Coach Willis via eBay (buy current version) 
Bracelet: c/o Yuni Kelley (use code SYDNEYSFD for 20% off)

Monday, February 11, 2013

DIY: How to make a circle skirt

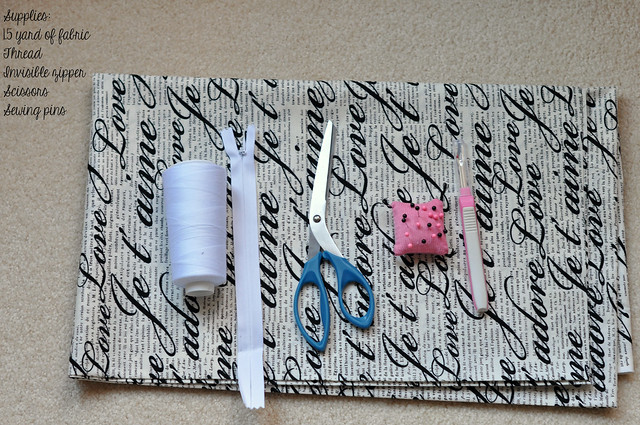
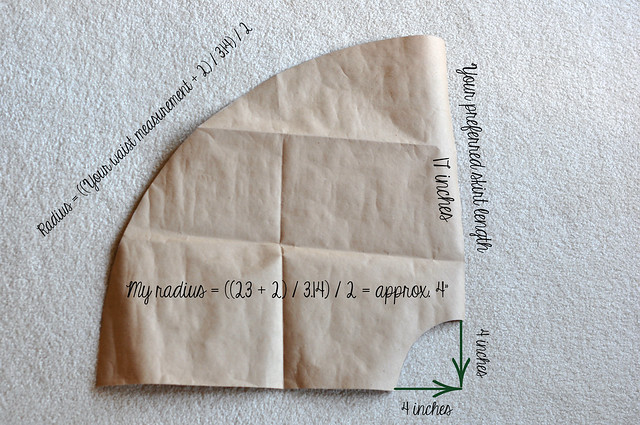
Work has been kicking my rear end lately. It’s not enough time in the day to get things done. Although, I did manage to find some time between the little one’s naps to sew me a new skirt last weekend. I am absolutely in love with this print. It has such a romantic feel to it. I ordered the fabric from here. I am terrible at explaining things so I hope these pictures will do a better job. This is my second DIY skirt (see my first one here). One thing I learned from my Mom is to be patient when it comes to sewing. I was so excited to get my first skirt done and made many mistakes. This time, I took my time and it turned out so much better. If you need instructions on how to attach a waistband to a skirt, check out this tutorial (I didn't use interfacing in my waistband). I press and hand-sew all seams, try the skirt on and repeat. Once I am happy with the results, I then use my sewing machine to sew right on top of the lines. Here's a sneak peek. If you have any questions, please feel free to leave me a comment. Stay tuned for the reveal later this week.


Sunday, January 20, 2013

DIY: A full circle skirt


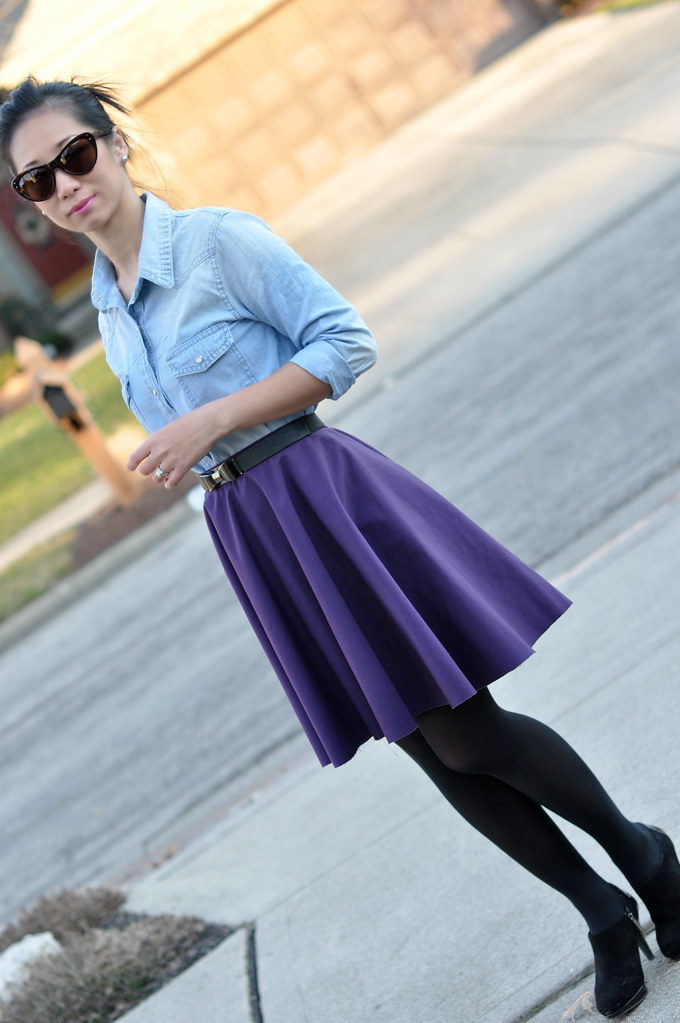
Inspired by a few petite bloggers, learning about sewing is starting to interest me. I altered some of my skirts here and here but have never made anything from scratch. Last week, I decided to make my first piece of clothing – a full circle skirt. The concept is simple but it took me quite some time to finish the skirt (with the help of my dear mother). I am so excited about this skirt that I wore it out before finishing the hem =) The raw edge is not visible from afar. I will finish the hem and do a separate post to show you how to make this skirt if you’re interested.

Sunday, July 22, 2012

DIY: Gold tube necklace

I do love my statement jewelry but sometimes it’s nice just to wear simple, delicate pieces for a casual look (especially when it's so hot outside). I've been wanting a simple bar necklace for a while but couldn't settle on anything so I decided to make my own version instead.

Supplies:

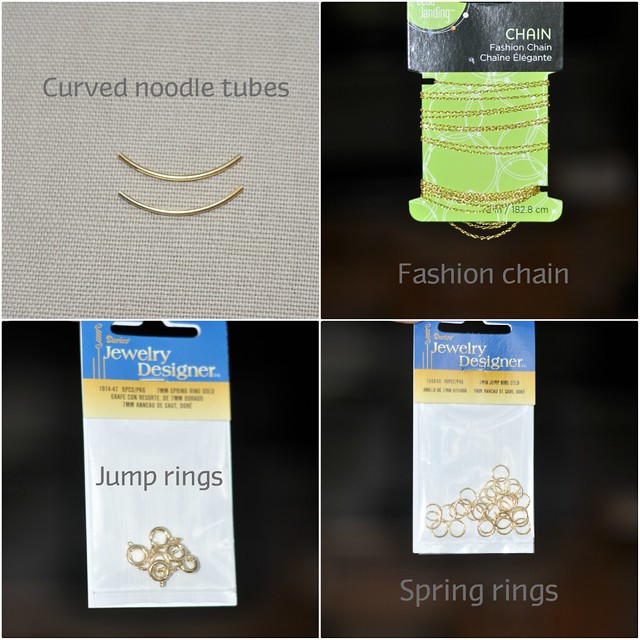
- Curved Noodle Tube Beads 40mm x 2mm: I got these tubes from Amazon and am very happy with the purchase. They are made from 14K gold filled, come in a pack of 2, definitely have a good weight and feel to them.
- Fashion chain: You can use an old chain if you'd like. I got this chain from Michael's. Make sure your chain is small enough to feed through the tube.
- Jump rings and spring rings: I got these at Joann's but you can find them at any craft store.

Thursday, March 29, 2012

DIY: Leather wrapped chain bracelet

I've been looking for leather wrap bracelets for quite some time. I've found many that I liked but they were way too big for my wrist. After many attempts, I thought "why not make my own". I found this useful tutorial and decided to give it a try.


My local Jo-Ann's has a very slim section for chains and I couldn't find anything I really liked. I was so happy to stumble upon this Forever 21 chain. The style/size is exactly what I was looking for. It's available in silver-tone as well if you don't like gold-tone. I followed the tutorial and below are step-by-step instructions.

Sunday, March 4, 2012

DIY: No Sew Oversized Envelope Clutch

A few months ago, my MIL who works for an upscale furniture store gave us a few rolls of beautiful leather. They've been sitting in the basement unused. Yesterday, I decided to make myself an oversized clutch. I made a few minor mistakes here and there but overall, I like the way it turned out. I was going to do a video for you guys but I know it'll take a long time to get it done. No video this time but I hope my pictures make sense. If you have any questions, I am more than happy to answer them.


What you'll need:
- 18x24 poster board
- 2 pieces of foam (for the lining)
- A bunch of binder clips
- Fabric glue
- Magnetic snap
- A cute button
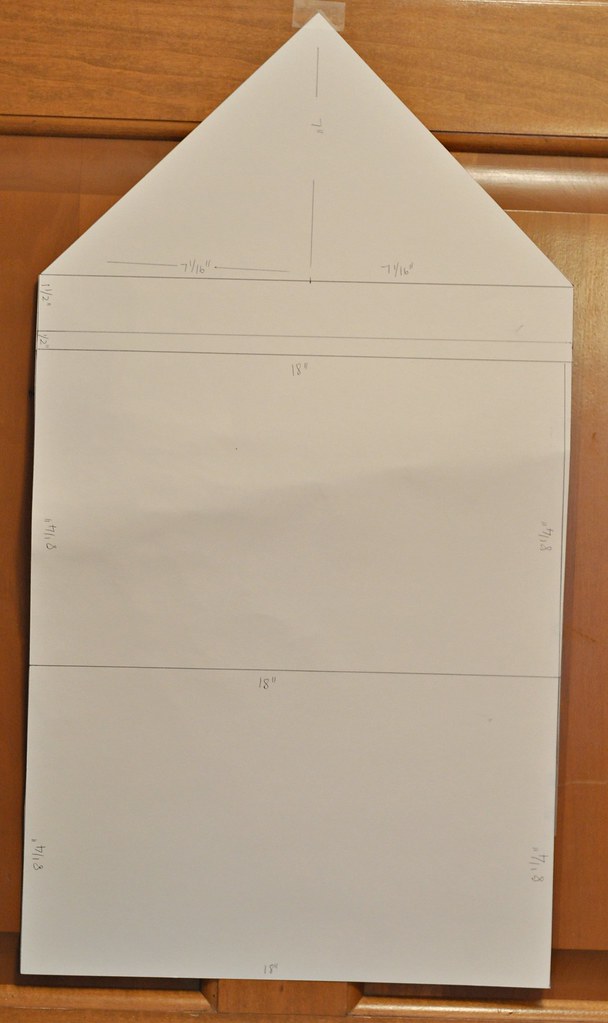


This is the dimensions of my clutch (18 inches wide and 8 1/2 inches high). I draw all my measurements on the poster board and cut it to the actual size. You can adjust whatever size suits your preference. I used my husband's razor blade for all my cuttings. Razors work much better and faster than scissors

Glue 2 pieces of foam onto one side of the drawing. You can buy a bigger piece of foam but my store ran out of them. 2 pieces work just fine for me. After you glued them together, wait a few minutes for the glue to dry then cut the excess foam off. One side of your drawing is now poster board and the other side is foam.
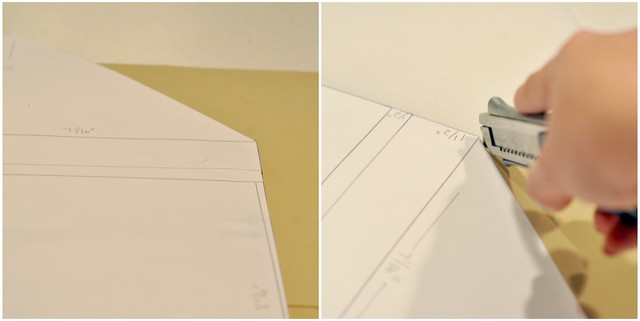
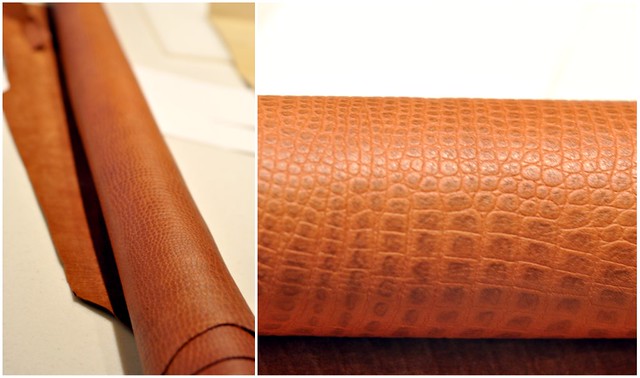


Now, it's time to glue the leather (or vinyl) onto the poster side of your clutch. After the glue has dried, cut the leather 3/4 inches larger all around than the drawing. Then you want to fold in the excess leather, glue and use the binder clips to secure. Wait about 15 minutes for the glue to dry then fold 2 flaps together and glue again.


Now it's time to put in your magnetic snap and your button. You can be done at this point. However, I'd like to add a bit of character to my clutch by adding leather trim all around. At first, I wanted to sew decorative stitches around my clutch but my sewing machine couldn't handle the thickness of the leather. After breaking 2 needles, I gave up. I went to the store and bought a roll of leather trim. I used the same fabric glue and glued the leather trim around the outline of the clutch.


This is the final product. It took me about 3 hours from start to finish. I am happy with the way it turned out (even with a few minor mistakes). I am thinking about making another bright one for summer. You don't have to use leather, vinyl should be just fine. I hope you enjoy the tutorial. If you have any questions, please feel free to leave me a comment.


Have a great week!
Sydney

Wednesday, February 8, 2012

(Semi) DIY Sequin Skirt

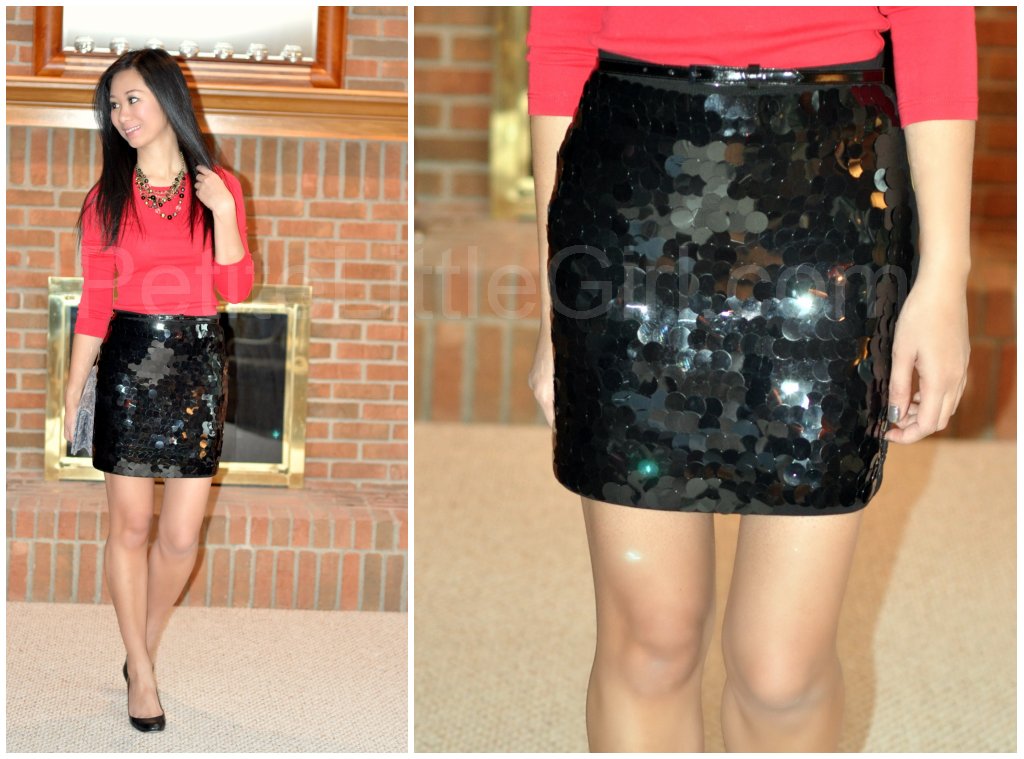
I know this is a long overdue post =) I wore this DIY sequin skirt in my last PFC and several of you were interested in knowing how it was done. I should have clarified this is a semi DIY skirt (will explain later). With Valentine’s Day is just one week away, I thought I would show you guys how I did my sequin skirt just in case you want to make your own.


What you need:
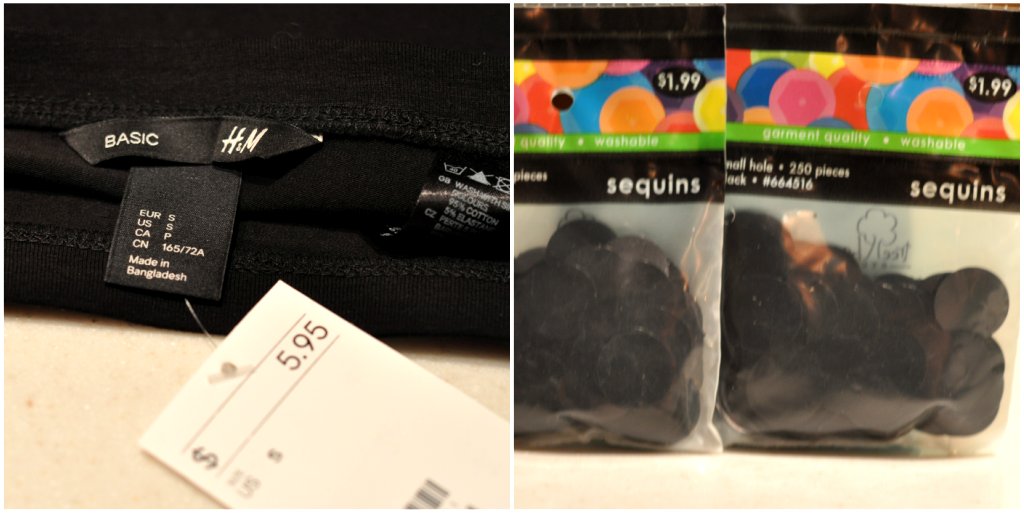
- You’ll need a basic knit skirt. That's why I call it semi-DIY since I didn't sew the skirt myself. For $5.95, it saved me a lot of trouble and time. I got mine at H&M but you can also find similar skirts at Forever 21 for cheap.
- Sequin: I bought 5 bags of sequin from Hobby Lobby for 1.99 each. I personally like the larger sequins and not too sparkly. You can purchase sequins in a variety of sizes, shapes and colors from craft stores.
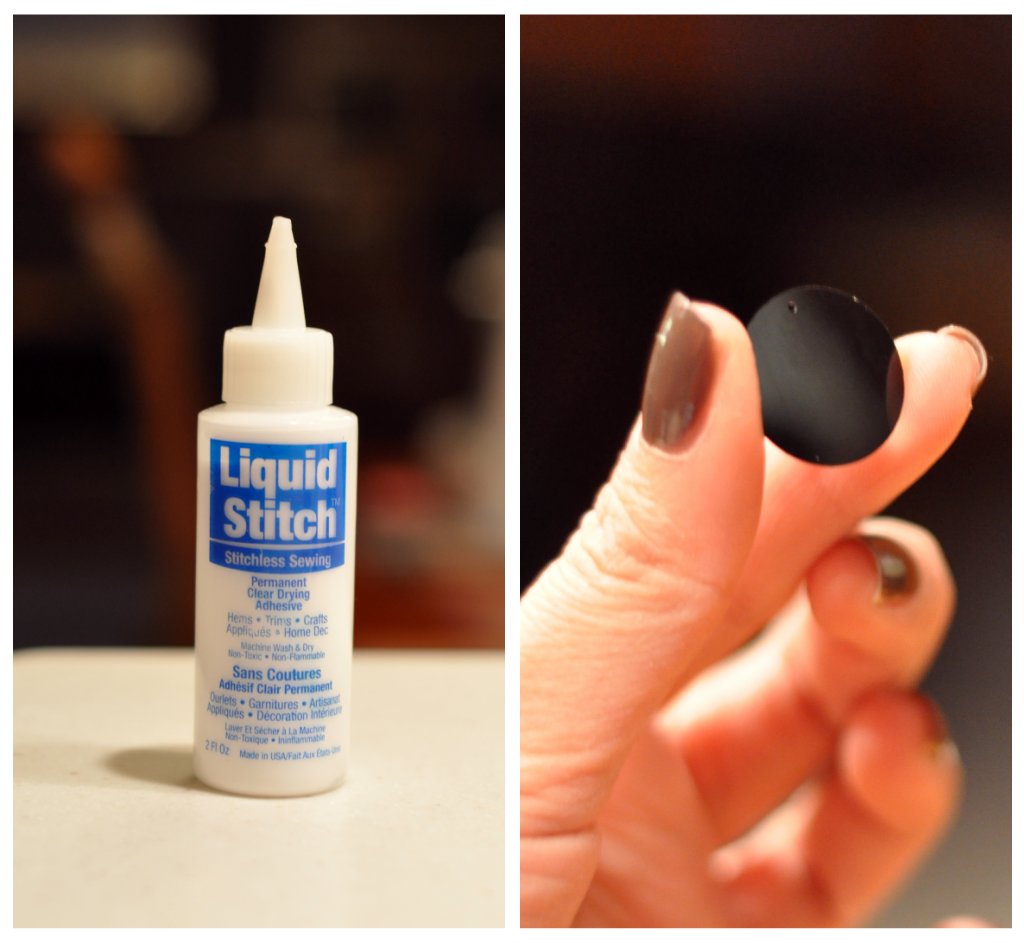
- Fabric glue: I got this Liquid Stitch Adhesive at Joann but it can be found at any craft-supply store.


How to glue sequins:
- Lay the skirt on a flat surface such as your counter top or a piece of hardwood.
- Squeeze out a tiny dot of glue on the matte side of the sequin.
- Place the sequin on your skirt and press down slightly until a dot of glue oozes through the center of the sequin.
- Continue applying the sequins until you have a straight horizontal row.
- Start the 2nd line using the above steps until you’re done.

{Wearing: Skirt: DIY (buy similar) | Tee: J.Crew perfect-fit tee | Shoes: Ann Taylor perfect leather pump | Necklace: Lia Sophia (buy similar) | Clutch: Banana Republic exotic clutch (buy similar}

After 5 hours and 1250 pieces of sequins (I used up 5 bags – 250 pieces per bag), this is the final product. I hope you enjoy this tutorial as much as I do. I've been looking for a fun sequin skirt for special occasions for a while but couldn’t find anything that suits me. I had so much fun with this project and the little one did too =) If you end up making one, please share with me!

Have fun!
Sydney
Sunday, December 18, 2011

Altering a size 12P skirt to a 00P

Hi everyone,

We just came back from our vacation late last night. After all, nothing feels like home. Today is laundry/catch-up day. My husband and the little one are going shopping right now so I have a bit of "me" time. I want to do a quick post to show you a DIY project that I did last week.

I felt in love with the Ann Taylor Modern A-line Zip skirt when it first came out but the $98 price tag was too pricey for me. By the time it goes on sale, small sizes are gone. It went on final sale last week for $9.95 plus an additional 25% off. The only size left that I found in store that day was a 12P. I decided to bring it home and do my own alterations. For $7.50, if I don't succeed, there is nothing to cry about. Here is how it looks on me pre-alterations.

Sunday, November 27, 2011

DIY Project: Slimming and shortening a skirt

I've been on the look out for a wool pencil skirt in burnt orange but haven’t run into anything that caught my attention. Then I decided to look on eBay. I was so excited to find 2 vintage wool skirts for a total of $14.00 (shipping included). The waist measures 24 inches which is perfect for me. Unfortunately, they were a smidgen long and wide for my frame. I decided to bite the bullet and attempt a DIY alteration. I did a video with the intention of showing you how to do this step by step. However, it didn’t turn out very well. It was extremely hard to cut/sew/film at the same time. So no video this time, but I definitely will put more time into it for my next DIY project.